Running a WooCommerce store is no small task, especially when you’re constantly dealing with spam registrations, fake orders, or even more serious threats like chargeback fraud. These unwanted actions don’t just waste your time; they compromise the integrity and security of your online store. That’s where email blacklisting in WooCommerce steps in as a powerful solution.
By using tools like the Aelia Blacklister plugin, developers and store owners can actively control who interacts with the store, blocking email addresses, domains, IPs, and even names linked to fraudulent behavior. It’s a smart and scalable way to secure your shop while keeping the experience seamless for genuine customers. For developers looking to further integrate and streamline services, consider using the WHMpress WHMCS WordPress Integration Plugin to connect your WHMCS and WordPress platforms efficiently.
Why Email Blacklisting Is Crucial in WooCommerce
Fraud and spam are not just annoyances,they can significantly affect your revenue, customer trust, and site performance. Email blacklisting is a proactive strategy to prevent unwanted interactions before they reach the checkout stage. By blocking known spam emails or domains, you can:
- Stop fraudulent orders
- Prevent fake account sign-ups
- Reduce customer service issues
- Save time, money, and your brand reputation
If you’re a developer managing a WooCommerce site, having granular control over access rules is a huge win. It ensures a smoother workflow for your clients and a better experience for customers. To further enhance your store’s visual appeal and user interaction, explore the Product Gallery Slider for WooCommerce – Twist plugin, which adds dynamic, mobile-friendly image sliders to your product pages.
Getting Started with Aelia’s Block Emails for WooCommerce Plugin
Aelia’s Block Emails for WooCommerce plugin is a lightweight, efficient solution that enables email blacklisting with minimal setup.
Installation Steps:
- Upload the Plugin Files: Manually place the plugin into your wp-content/plugins/wc-block-emails directory, or install it through the WordPress admin dashboard.
- Activate the Plugin: Go to the Plugins page and click “Activate.”
- Configure Settings: Navigate to WooCommerce > Settings > Block Emails, where you can input specific email addresses or domains to block.
Once configured, the plugin checks all incoming checkout attempts. If a user tries to purchase with a blacklisted email or domain, they’ll receive a custom error message, and the transaction will be immediately halted.
Bulk Upload Support
Managing a large store? No problem. Aelia’s plugin supports bulk uploading of email addresses or domains, making it ideal for stores combating persistent spam or operating in high-risk industries.
Understanding How Email Blocking Works
Email blacklisting is more than just rejecting a single address. The plugin allows blocking:
- Specific email addresses
- Entire domains
- Wildcards and regex patterns for complex rules
Example Use Cases:
- Block emails from temporary services like @mailinator.com
- Prevent known fraudulent buyers from reordering under different names
- Stop bot-generated spam by rejecting known bad email patterns
Aelia Blacklister for WooCommerce – A Complete Security Suite
For advanced users and developers, the Aelia Blacklister plugin offers a more robust toolkit. While the Block Emails plugin handles basic filtering, Aelia Blacklister lets you blacklist users based on multiple identifiers, not just email.
Key Features:
| Feature | Description |
| Email Blacklisting | Block specific emails or entire domains using regular expressions |
| IP Address Blocking | Block individual IPs or entire IP ranges (supports CIDR and wildcard formats) |
| Phone Number Restrictions | Block orders linked to suspicious phone numbers |
| Customer Name Blacklisting | Stop users with flagged names from placing orders |
| Custom Error Messages | Display personalized warnings for blocked users |
| Bulk Upload Support | Add large lists of emails, IPs, or names with ease |
| Flexible Rule Settings | Use regular expressions for precision control |
All of this can be configured from your WordPress dashboard, under WooCommerce > Blacklister.
Benefits of Using Email Blacklisting in WooCommerce
Still wondering why this matters for your store? Here are the key benefits:
Enhanced Security
Prevent malicious actors from making purchases, registering fake accounts, or abusing coupon systems.
Reduced Spam & Fraud
Say goodbye to junk orders, bot sign-ups, and time-consuming refund processes.
Better Performance
Fewer spam orders mean cleaner databases, faster site loading, and smoother order management.
Improved Customer Trust
By maintaining a secure environment, you build credibility, reduce complaints, and encourage repeat business.
Cost Efficiency
Avoid costly chargebacks, fraud investigations, and customer service tickets.
Developer Flexibility
Create advanced, regex-based rules without touching core WooCommerce code.
Customizing the User Experience
Blocked users aren’t just shut out,they receive a customizable error message you define. This gives you the chance to:
- Clearly explain why their order can’t go through
- Redirect them to support if necessary
- Maintain a professional brand tone,even in denial
Setting Up Aelia to Block Email Addresses
To effectively block email addresses in WooCommerce while using Aelia, integrate the “Aelia Blacklister for WooCommerce” plugin. Follow these steps to set up the necessary plugins and configure the blocking settings.
Step 1: Install the Plugin
- Go to the Plugins section of your WordPress dashboard.
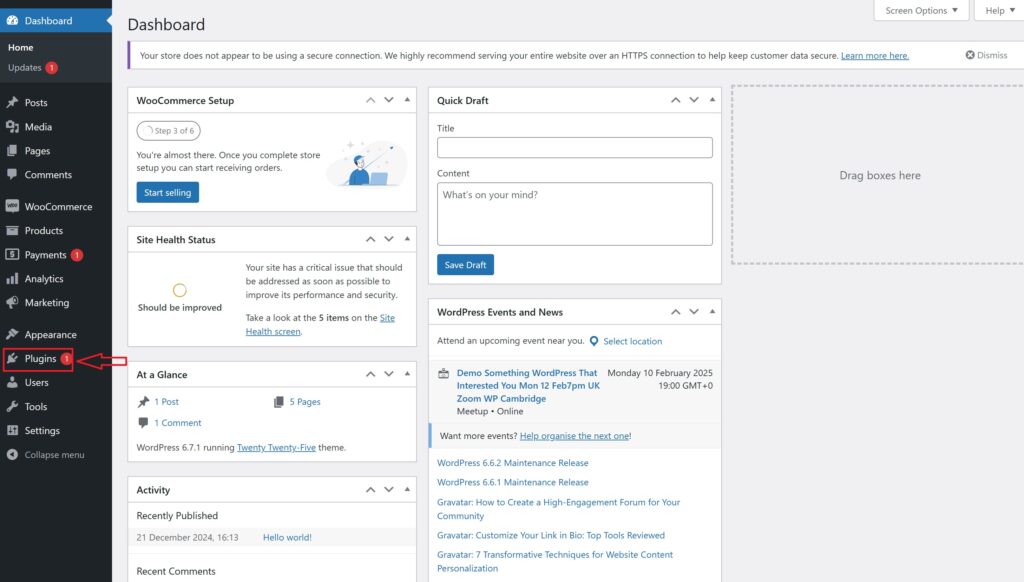
- Click on Add New Plugin

- Select Upload Plugin
- Click Choose File, then select the Aelia Blacklister plugin zip file you downloaded from the Aelia website.
- Click Install Now.
- Once the plugin is installed, click Activate.
Step 2: Access the Plugin Settings
- After activation, go to WooCommerce and click on it.
- Look for the Blacklister tab in the settings menu (it might appear under the Aelia tab depending on the version of WordPress).
- Click on the Blacklister tab to access the plugin’s settings.
Step 3: Block Email Addresses
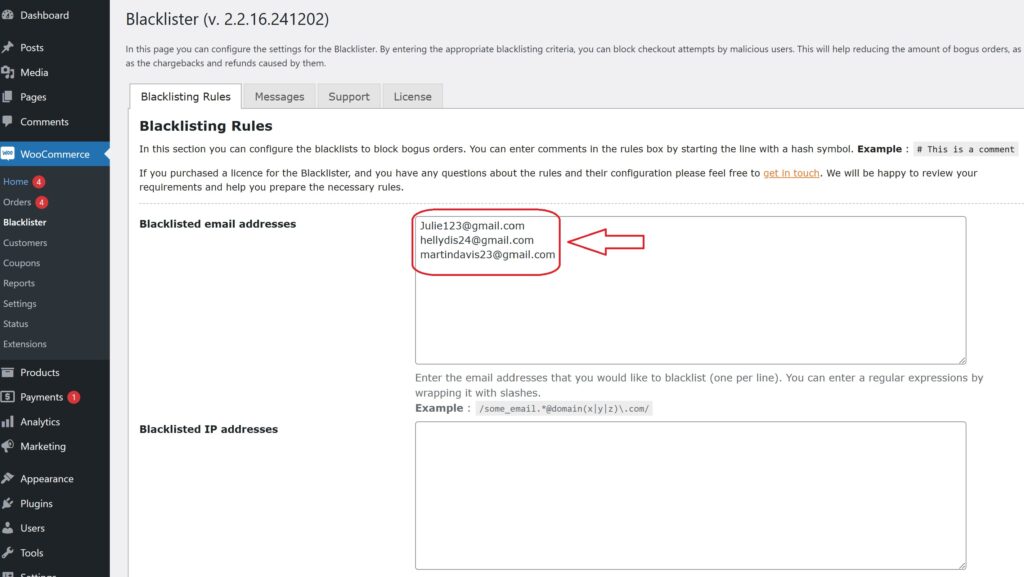
- In the Blacklister settings, find the option called Blacklisted email addresses.
- Enter the email addresses you want to block in the provided text field (you can block multiple email addresses by separating them with commas or entering them one by one).
- After entering the email addresses, Scroll Down and click Save Changes.
Step 4: Test the Configuration
- Go to your WooCommerce checkout page.
- Try to register or make a purchase using one of the blacklisted email addresses.
- If the plugin is correctly set up, the user will not be able to complete the purchase or registration.
How to Get Support for the Aelia Blacklister for WooCommerce Plugin
If you need assistance with the Aelia Blacklister for WooCommerce plugin, the support process is simple and user-friendly. Within the plugin’s settings, navigate to the Support section. There, you can submit your issue or describe any technical problems directly in the comment box provided.
Once your request is submitted, Aelia’s responsive support team will review your message and get back to you with personalized guidance, helping you resolve any challenges efficiently.
Whether you’re troubleshooting email blacklisting rules, setting up regex filters, or configuring advanced blocking features, Aelia’s team is ready to assist.
Pro Tip: Enhance Store Functionality Further
Looking to go beyond blacklisting and improve your customer experience? Check out Tax Display by Country for WooCommerce,a powerful plugin that automatically adjusts tax visibility based on the shopper’s location. It’s an excellent addition for stores selling globally, offering a more localized and streamlined checkout experience.